
DIY upcycled furniture offers a satisfying way to breathe new life into old pieces while contributing to environmental sustainability. Reclaimed materials are both cost effective and unique. This article explains the process from start to finish, giving you ideas and practical tips to transform discarded items into stylish furniture.
Getting Started with Upcycled Furniture
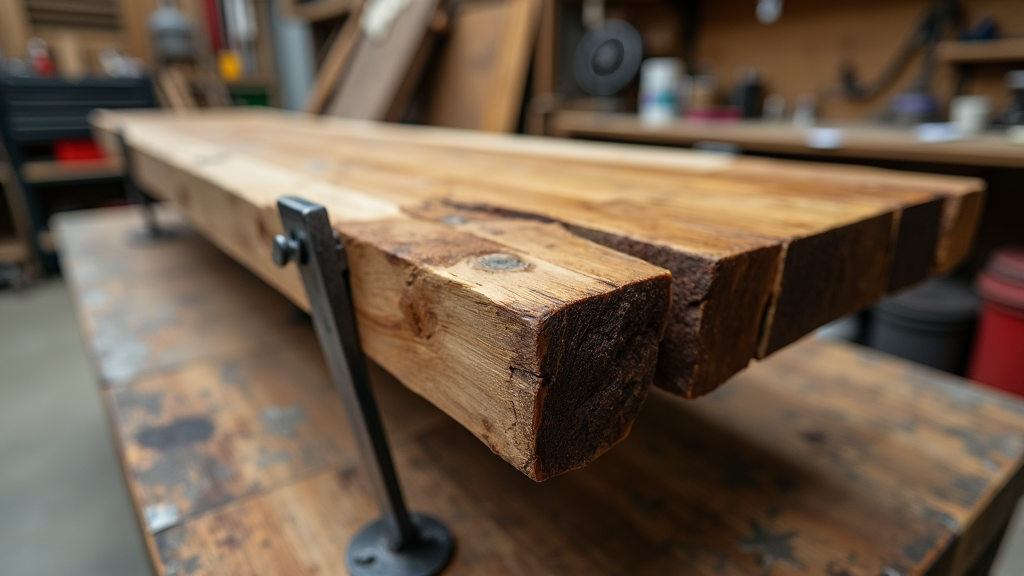
Reclaimed materials come from various sources such as old barn wood, discarded pallets, and even vintage metal parts. Upcycling these items into furniture may seem challenging at first, but with careful planning and the right approach, it becomes a creative adventure. I got a sense that the key to effective upcycling is not only a passion for crafting but also an understanding that every piece has its own story and character.
Before jumping into your project, it helps to learn the basic benefits of DIY upcycled furniture. First, it reduces waste by repurposing materials that might otherwise end up in landfills. Second, reclaimed materials often carry a history and natural beauty that new materials cannot match. Finally, these projects are flexible. You can create anything from a rustic coffee table to a chic bookshelf with some creativity and patience.
The Potential of Reclaimed Materials
Working with reclaimed wood, metal, or other materials opens up a world of design possibilities. Unlike store-bought wood, reclaimed pieces often display knots, unique grain patterns, and weathered finishes that add character. I always find that once you start upcycling, you appreciate the difference in quality and style.
Many people are now turning to reclaimed materials because they connect us with the past. Every scratch and dent on a piece of reclaimed wood tells a story. In a society where mass-produced furniture is common, using original materials gives your projects an authentic feel. Moreover, repurposing items can be both economical and environmentally friendly.
Essential Tools and Materials for DIY Upcycled Projects
Just as with any worthwhile DIY project, upcycled furniture work requires the right set of tools and materials. Having these at your disposal can make the process smoother and ensure that your finished product performs well. Key tools you might consider include a good quality sander, saw, and a reliable hammer. Measuring tools, wood glue, and finishing products like stain or varnish are equally important. Here are some of the essentials:
- Sander: An electric sander helps smooth out rough surfaces, making them ready for finishing touches.
- Hand Saw or Power Saw: Cutting reclaimed wood to the right size is critical; having a saw that fits your project can really speed things up.
- Measuring Tape and Level: Accurate measuring ensures your pieces fit together perfectly while giving the finished item a neat appearance.
- Protective Gear: Safety glasses, dust masks, and gloves are a must to protect yourself during the process.
- Finishing Products: Stains, sealants, and paints help step up the natural beauty of reclaimed materials and protect them from wear.
Investing in quality tools doesn’t have to be expensive. Sometimes you can find them second-hand or even borrow them from friends. A well-equipped workspace makes tackling even advanced projects easier and more enjoyable.
Finding and Preparing Your Materials
One of the most exciting parts of upcycling is the hunt for the perfect reclaimed materials. Look for items that have character and the durability to be transformed into various kinds of furniture. Local salvage yards, antique stores, or even your own backyard can be great sources.
After collecting materials, proper preparation ensures your project lasts. Cleaning is usually the first step. Old wood should be carefully sanded to remove splinters and rough patches. Some pieces may need to be treated for pests or decay. Taking your time during this phase is important, as a meticulous preparation process pays off in the final product.
Some reclaimed materials may require more than just cleaning. If you’re working with wood, consider a chemical treatment or a natural oil finish to both preserve and step up its grain. For metal pieces, rust removers and proper priming are needed before any painting or finishing.
Planning and Designing Your Project
Planning is a fundamental aspect of any successful DIY project. Without a clear design, even the best materials can end up in a less-than-ideal finished product. It is a good idea to sketch out your plan beforehand. A simple pencil drawing is often enough to give you a rough idea of the dimensions and overall look.
During the planning phase, consider what you want to achieve with your upcycled piece. Whether it’s a coffee table, a bookshelf, or a bench, the design should reflect both functionality and aesthetics. You might also aim for a specific style—rustic chic or industrial modern—that best suits the reclaimed materials you have gathered.
Another helpful tip is creating a detailed inventory of the materials you already have, followed by a list of those you need to acquire. This not only saves time, but also ensures you won’t face surprises halfway through your project. Always allow a little extra for error or modifications once you begin assembling your piece.
Step-by-Step Guide to Building an Upcycled Piece
Building upcycled furniture is all about translating your vision into reality carefully and methodically. Here’s a general process to guide your efforts:
- Concept and Measurement: Start by sketching your design and measuring all required dimensions. This helps you figure out how the parts fit together and ensures your project will stand up to regular use.
- Material Preparation: Clean and treat your reclaimed materials properly. Wood might need sanding while metal requires rust removal and priming.
- Assembly: Use nails, screws, and wood glue to securely join the pieces. Taking your time to secure a strong, stable assembly pays off in durability.
- Finishing Touches: Once assembled, apply finishes such as stain, paint, or sealants. The finishing touches step up durability and add to the overall aesthetic of your creation.
- Final Inspection: Give the item a thorough look over to check for any loose parts or uneven surfaces. This is also a chance to add any final decorative elements if desired.
This process can be adapted for virtually any piece of furniture. The beauty of DIY upcycling is the flexibility in each step, allowing your personal style and creativity to lead the way.
Overcoming Common Challenges
No DIY project is completely free of challenges. Upcycling antique or reclaimed materials means you’ll have to work with imperfections and sometimes unpredictable elements. Here are some common issues and suggestions for dealing with them:
- Uneven Surfaces: Reclaimed wood might have warps or bumps. Using a sander to smooth these areas can help create a uniform surface for finishing.
- Old Fasteners: Nails or screws in old wood might be rusted or stuck. Carefully removing them with the appropriate tools or even drilling new holes might be necessary. Always check that your fasteners are secure in the finished piece.
- Pests and Debris: Some reclaimed wood may harbor old infestations. A deep clean and proper treatment with eco-friendly solutions can ensure your material is safe for use before assembly.
- Matching Finishes: Bringing together different elements with varying finishes can be tricky. Test finishes on small sections first to see how the reclaimed materials react before applying them to the entire piece.
Facing these challenges head on means your upcycling project will not only be more durable but will also provide a greater sense of achievement upon completion. Remember, every imperfection can add to the story of the finished piece.
Advanced Upcycling Ideas for the Ambitious DIYer
After mastering the basics, you might want to explore more creative techniques. Advanced upcycling projects often involve mixing different materials, experimenting with bold colors, or incorporating unexpected design elements.
One fun idea is combining wood with metal or glass elements to create a contrast in textures. For example, replacing a plain tabletop with a section of reclaimed wood bordered by metal can create a striking piece. This combination not only adds visual interest but also increases the item’s durability.
Another idea is incorporating repurposed items such as vintage door handles, old cabinet knobs, or even reclaimed windows into your design. These details add character that cannot be replicated by modern materials. The challenge here is to ensure these decorative elements complement the overall structure of your piece rather than overwhelm it.
Advanced projects also benefit from experimenting with new construction techniques. Trying different methods of joining wood pieces—such as using hidden fasteners or specialized joints—can deliver a stronger, more refined finished product. As you grow more comfortable with basic design and construction techniques, gradually exploring these innovative practices can open up endless opportunities for creative expression.
Frequently Asked Questions
Question: How do I choose reclaimed materials that are safe and durable?
Answer: Look for materials that show no major signs of decay or infestation. Investing time in cleaning and treating your reclaimed wood or metal is very important to ensure longevity.
Question: Is upcycling furniture expensive?
Answer: Upcycling can actually be cost effective. Many reclaimed materials are free or inexpensive, and investing in basic tools will serve you well in the long run. The key is working within your means and sourcing materials creatively.
Question: Can I mix different types of materials in one project?
Answer: Absolutely. Mixing reclaimed wood with metal or glass can create a dynamic and interesting look. Just make sure the finishing processes for each material are compatible.
Question: How do I maintain and care for upcycled furniture?
Answer: Maintenance is relatively simple. Keep the piece clean, reapply finishes like sealant or varnish periodically, and check that all joints and fasteners remain secure.
Additional Tips for a Successful Upcycling Experience
When you decide to take on an upcycling project, it is a good idea to spend extra time researching different styles and techniques. Reading blogs, watching instructional videos, and even visiting local workshops can give you plenty of inspiration to build on your ideas. Learning from others who have been through the process can help smooth the way and boost your confidence before you start your own project.
Consider setting aside a dedicated workspace where you can safely experiment with different methods. This not only makes your work more organized, but it also becomes a creative hub where mistakes are seen as part of the learning curve. Taking the time to properly set up and maintain your workspace is really important, as it lays the foundation for a successful upcycling experience.
Another useful tip is to plan for potential challenges before they arise. Whether it’s by keeping extra tools on hand or having backup materials available, a little preparation can save you time and frustration later on. Experiment with small test projects first to see how different reclaimed items respond to various treatments and finishes.
Sharing your progress with friends or joining a community of DIY enthusiasts can also be very beneficial. Not only does this help you keep motivated, but it opens up opportunities to exchange useful tips and tricks. The collaborative environment can spark new ideas and encourage you to try innovative techniques that you might not have considered on your own.
Lastly, remember that the journey toward creating something truly unique is filled with trial and error. Each project teaches you something new about materials, techniques, and your own creative style. Over time, you will build a collection of successful projects and learn how to overcome even the most challenging obstacles. Treat each misstep as a learning experience that adds depth and character to your overall work.
Final Thoughts on DIY Upcycled Furniture
Create upcycled furniture with a mix of passion and careful planning. The process of transforming reclaimed materials into beautiful, functional pieces adds a personalized touch to your home that is hard to find in mass-produced items. Not only is this form of DIY environmentally friendly, but it also carries an artistic flair that reflects your personal style.
With the right tools, thorough research, and a willingness to experiment, you can turn recycled wood and metal into next-level cool art pieces that are both practical and inspiring. The success of any upcycling project comes down to paying attention to details, from the initial cleaning of materials to the final touches on your finished furniture.
Take a patient and methodical approach to each step of your project. Over time, as you build your skills and expand your creativity, upcycling will become a rewarding hobby that offers endless opportunities to explore new design ideas. By reusing old materials and reducing waste, you contribute positively to the environment while creating items that tell a unique story.
Bottom line: upcycled furniture not only boosts your crafting skills, but it also serves as a tangible reminder that creativity and sustainability can go hand in hand. So gather your tools, prepare your materials, and start turning yesterday’s items into tomorrow’s treasures.